Easy Cardboard Box Car for Toddlers and Preschoolers
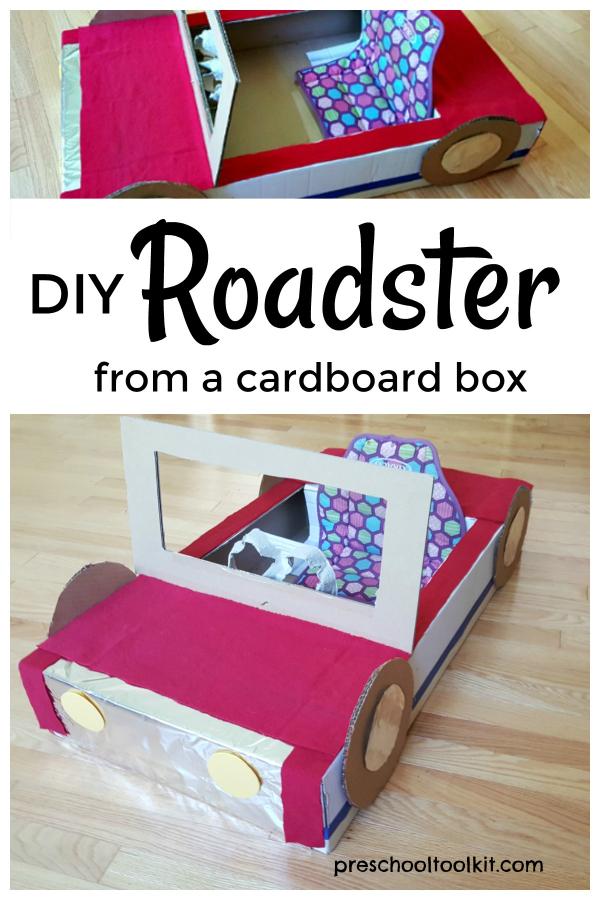
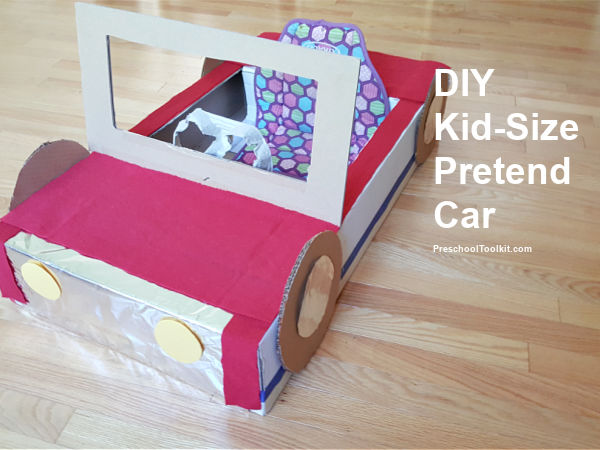
Transform a large cardboard box into a car for kids pretend play. This simple roadster is easy to make with recyclables. Toddlers and preschoolers can help with the construction, then have fun taking 'road trips' with their friends.
This post contains affiliate links. Privacy and Disclosure
Imagine the satisfaction your child will get from building his or her own kid-sized toy car!
This cardboard car project is a great way to involve kids in hands-on fun and learning.
Planning, cutting, folding, and gluing will help strengthen early childhood skills as kids create their very own cardboard box car.
While a tutorial is provided in this post, you can easily adapt the ideas to suit your available materials and preferences.
Start with a cardboard box and use everyday materials to complete the design.
Related: Kid-Size Props for Pretend Play
Cardboard box car
This activity supports early childhood skills in a fun STEAM project.
Kids will learn about engineering and technology as they build a play car for pretend play.
The role of engineering and technology
Designing and building are part of the fun: choosing materials, cutting and gluing, attaching car parts together. The car has a couple options for moving parts which add to the hands-on fun.
While this project requires adult supervision and assistance, kids can be part of the team creating the roadster.
The STEAM KIDS series of books offers lots of activities for kids for kids to build like scientists and create like artists. Interacting with materials in many different ways is an important element of kids play.
Learn more about how STEAM is realized in this activity at the end of the post.
The role of imaginative play
Pretend play in everyday activities has lots of benefits for kids, supporting social, cognitive and language development.
- Social: sharing rides in the car with a friend - maybe a favorite teddy bear?
- Cognitive: building and driving the car, following road signs and traffic signals
- Language: talking about things you see or do on a road trip
Supplies for a cardboard box car
The size of the roadster will depend on the size of box you have available. The instructions in this tutorial are for a long shallow box, but they can be adapted to any box. See ideas for using a square box at the end of the post.
- cardboard box
- craft knife
- fabric
- clear packing tape
- masking tape
- glue gun
You could use shelf liner in place of fabric for the covering, either self-adhesive or non adhesive.
White glue will work for this project but a glue gun may be more effective in the long run. You'll want to use a glue gun with care when kids are nearby.
Instructions for cardboard box car
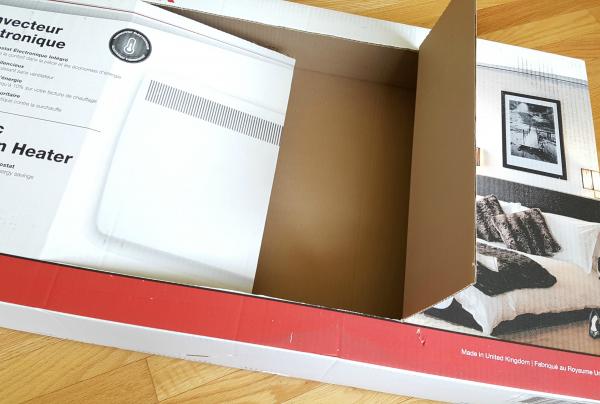
1. Recycled cardboard box
The box we used is a long rectangular shape, but you can adapt the tutorial to any box large enough to allow your toddler or preschooler to sit inside.
- Cut into the box approximately in the middle of the box by making a slit near both outside edges of the box. In our model the hood of the car is longer than the back end or trunk. Leave an outer edge on both sides of at least 2 inches ( cm).
- Divide this middle portion of the box approximately in half to form two flaps. In our model, one flap is larger than the other, a larger one to form the seat and a smaller one to form the dashboard.
- Raise one flap up to form the dashboard.
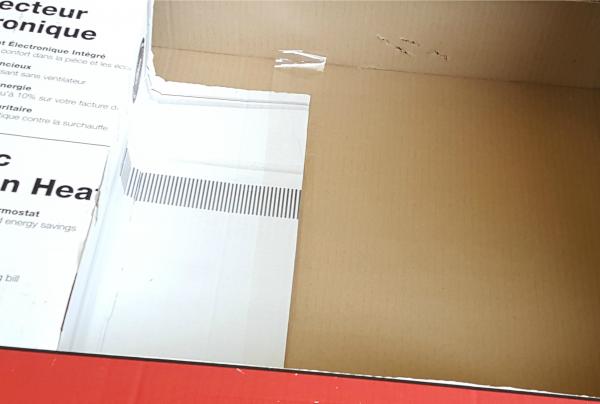
- Bend the other flap down to form the shape of the seat. Tape in place.
Note: To easily bend the cardboard, make a slight impression in the cardboard with the craft knife.
2. Box coverings
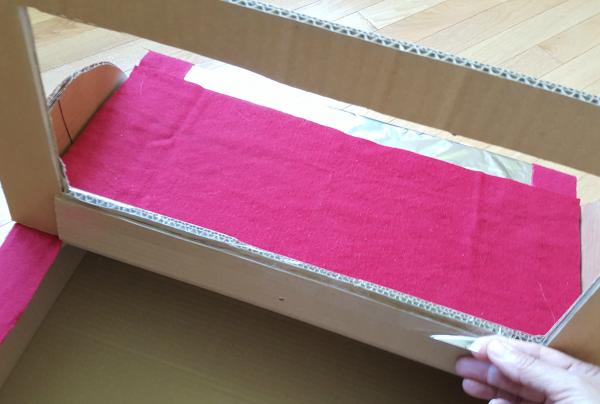
Cover the box with fabric or self-adhesive shelf liner. Alternately, kids might like to paint the car or decorate with crayons or markers.
- Cut strips of fabric for the sides. Cut squares or rectangles to fit the front 'hood' and back 'trunk'.
- Glue the fabric covering in place.
3. Windshield and/or dashboard
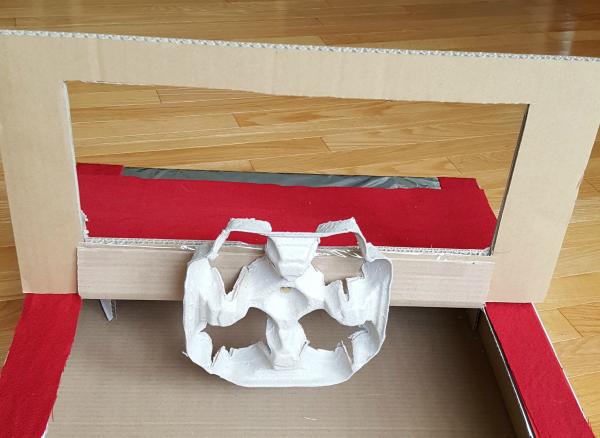
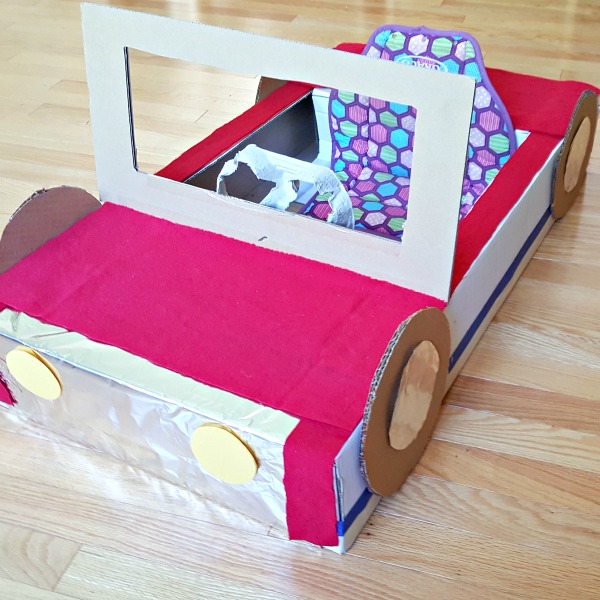
Use the box flap as a dashboard or cut a windshield from another piece of cardboard as we did.
- To attach a large windshield, trim the dashboard flap to the same height as the bottom part of the windshield frame.
- Tape the windshield securely to the dashboard.
4. Steering wheel
We used a take-out tray to make the steering wheel. Alternately, use a sturdy paper plate, or cut a circle from cardboard or a foam tray.
- Round the edges of a beverage take-out tray and cut the cup openings a bit wider.
- Attach the steering wheel to the dashboard with a paper fastener. Make the connection loose enough so the steering wheel can rotate.
5. Headlights
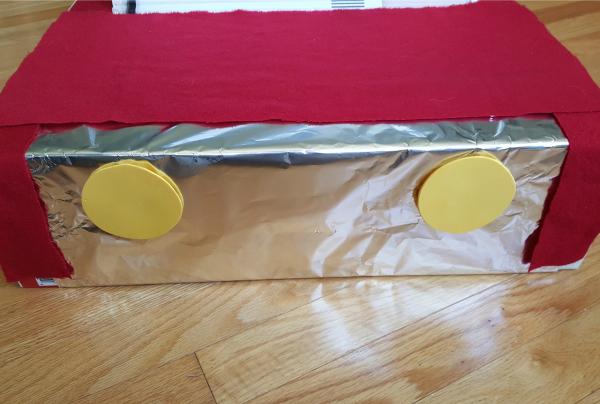
- Glue an aluminum foil grill to the front of the box.
- Cut circles from yellow craft foam for headlights.
6. Wheels
- Cut four wheels from cardboard.
- Tape or glue to the sides of the car. The bottom edge of the wheel should be just above the floor. You can also attach the wheels with paper fasteners if you want them to rotate.
- Color the wheels with paint or markers, or add designs such as spokes if preferred. We kept ours simple with just some foil hubcaps!
7. Upcycle a booster seat pad for a comfortable seat!
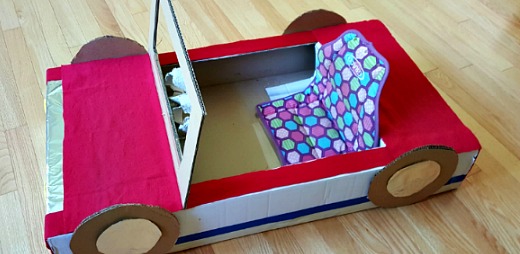
Optional: We added racing stripes along the sides with masking tape. They looked cool and also covered some small holes in the cardboard box.
You can easily add more options such as dashboard gadgets. You can cut open a section of the back end of the vehicle to make a 'trunk'.
If you are using a square carton, you can apply the instructions to the front of the car only.
- Remove three of the box flaps. Make the windshield with the flap that exists on one side of the box. Place the seat into the box, so it rests against the bottom and back of the box.
Part of the fun and learning with any project is the imagination and hands-on participation you and the kids bring to the activity.
Kids can get excited making their own toys and props, then get creative at playtime using these unique products.
Get ready to make your own with made-to-order toys!
How STEAM is incorporated:
Science: How does a car work? (decide what parts are needed)
Technology: What tools do we need to build a car? (scissors, glue, paper fasteners)
Engineering: How will the parts go together? (design and build car)
Art: What color will the car be? (choose fabrics and wheel colors)
Math: How many wheels does my car need?
