

A cardboard box theater for marionettes is fun for kids and grownups to make together. This homemade theater accommodates everything from simple string puppets kids can make, to more detailed store-bought marionettes.

Puppet shows with marionettes are so exciting. They’re filled with magic and movement, telling stories with song and dance.
This homemade theater is the perfect platform for staging your puppet shows with marionettes.
While we love making and using hand puppets (including stick puppets), puppets controlled by strings have a special quality of their own. They seem more lifelike, making a real connection with the audience.
Related CBC Kids article: Find out more about how marionettes work.
Homemade puppet theaters make good use of cardboard boxes, large and small. We’ve already made a few different puppet theaters, including one from foam packaging.
This tutorial is a little more involved than earlier ones we’ve posted for hand puppets, but the overall procedure is not complicated.
Homemade cardboard box puppet theater
The tutorial includes instructions for a theater, a back drop and a drop-down cardboard ‘curtain’. The main variable will be the size and shape of the box you use.
Supplies for a theater for marionettes
- masking tape
- scissors
- paint or markers
You will also need extra pieces of cardboard to support the structure, and to make the curtain and back drop.
Related: Puppets and Theaters on Pinterest
Instructions for marionettes theater

Start with a large box with flaps.

Place the box on its side.

Bend the top flap up.
Cut out two long strips of cardboard. Bend both ends of each long cardboard piece back approximately 2 inches (5 cm).
Tape one end of one cardboard strip to the top corner of the box flap, and then to the top of the box as shown. Repeat on the other corner.
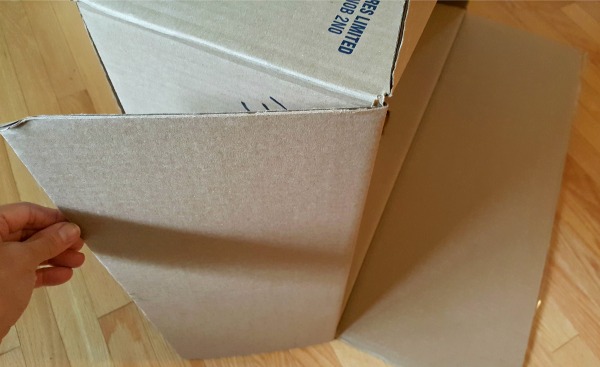
Fold the sides back completely and tape in place.

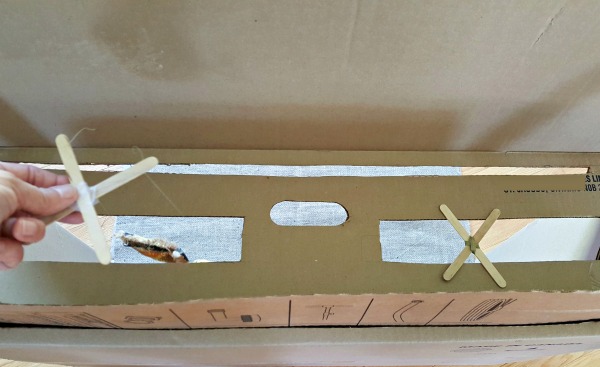
Make cuts in the top of the box as shown. Note: the small hole in the middle was on the box before we started and is not part of the tutorial. It can be used as a convenient handle to transport the theater as needed.
- Make a long rectangular opening in the front and back with scissors or a craft knife. Each opening should be almost the full length of the box, and approximately one inch (2.5 cm) wide. The opening near the front or open area of the box will be for the curtain and the other opening will be for the back drop(s). The instructions for the curtain and backdrop are seen below.
- Remove a portion of the cardboard in the center to insert the puppets. This opening will be wider than the slits at the front and back, and can be one opening or two separate openings (as shown). The opening(s) will be as long and wide as necessary for you to hold the strings and operate the movements of the marionettes. Removing too much of the top of the theater might weaken the structure so start with the minimum required and make the openings larger as necessary.
Make a backdrop

The size of the cardboard you use for the backdrop will be determined by the size of the box used to make the theater. The backdrop will fit into the opening at the top of the theater, and will cover the back area of the inside of the theater after it is inserted into the opening.
Sketch drawings on a large poster board or piece of cardboard. You can see the two cut-outs on the left that I used as patterns for the flowers.
The backdrop and curtain should be slightly taller than the height of the theater so you can easily insert and remove them.
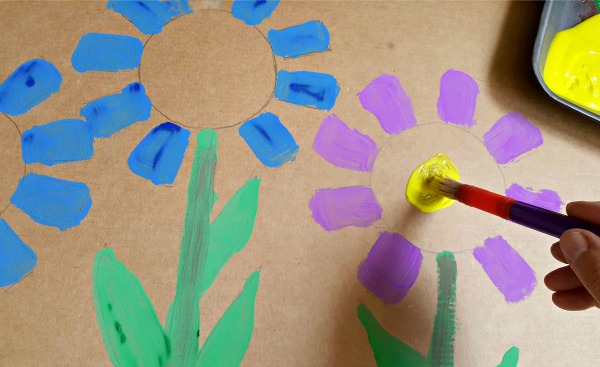
Paint the design with craft paints, or color with crayons or markers.

BACKDROP
Make a curtain
Follow the instructions for the backdrop to determine the size of the curtain. Decorate the curtain with paint or markers or crayons in the design of your choice.

CURTAIN
Assemble the theater

Slide the backdrop into the opening at the back. Slide the curtain into the opening at the front.

The cardboard backdrop and curtain should both be tall enough to leave a portion sticking out of the top of the theater for easy removal.

This store-bought marionette was too large too fit down through the opening at the top of the theater, so we inserted the crossbar attached to the string puppet up through the opening from underneath.
The crossbar can rest on the top of the box while you put the curtain in place so the puppet is not revealed until the performance begins!
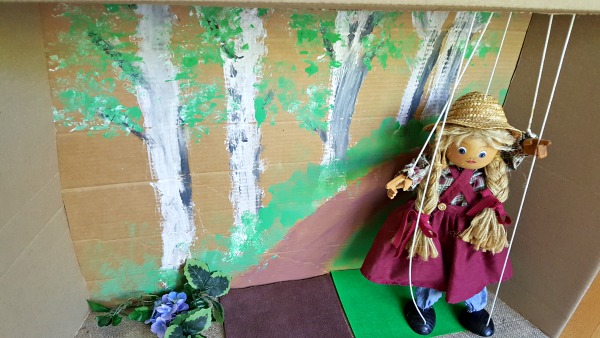
This is what the audience sees!
This marionette has been used a lot, and re-strung several times but it is still a favorite.
You can paint the theater inside and outside if preferred. Inside, plan for a neutral design that will accommodate any backdrop scene that is made to go along with a specific story.
Theater with homemade butterfly puppets
You can transform other types of puppets, such as these burlap butterflies we made, into string puppets.
Make an X shape with two craft sticks and tape them together in the middle. Attach a string to opposite ends of one of the craft sticks, then attach a string to the puppet, in this case to each wing of the butterfly.
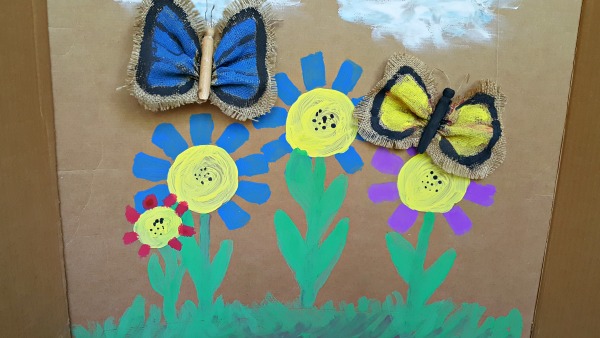
This is how the audience views the butterfly puppets!
Kids will love helping with the construction of theater for marionettes. Designing, painting, and working together to complete the project will build fine motor and cognitive skills in early learners.
When your theater is complete, entertain your audience with movement, story and song with an awesome marionette performance!
