
A portable craft box can help you enjoy stress-free arts and crafts activities with the kids. Keep supplies organized and ready so setups and cleanups are quick and easy. Check out these tips for creating a go-to craft box that promotes creativity, not chaos.
Privacy and Disclosure for information on the use of affiliates and cookies
There is a way to minimize stress when it comes to crafting with the kids. A simple yet effective way to optimize set up, work in progress, and clean up, all while supporting kids creativity.
The answer is a well-stocked, portable craft box.
Maybe the idea of lugging supplies out of a closet or drawer, and making numerous trips back and forth to gather everything together, doesn’t appeal to you.
Do we have time? Will it make a mess? Where are the kids scissors?
That’s where the prepared craft box comes in. And it’s easy to put one together to support creative art activities, even spontaneous ones.
- Supplies will be organized, conveniently accessed, and ready at a moment’s notice for impromptu art sessions.
- A limited amount of available materials will prevent kids from being overwhelmed with choices. Additional materials may be kept in storage to replenish the craft box as needed.
Related: Kids Own Craft Box
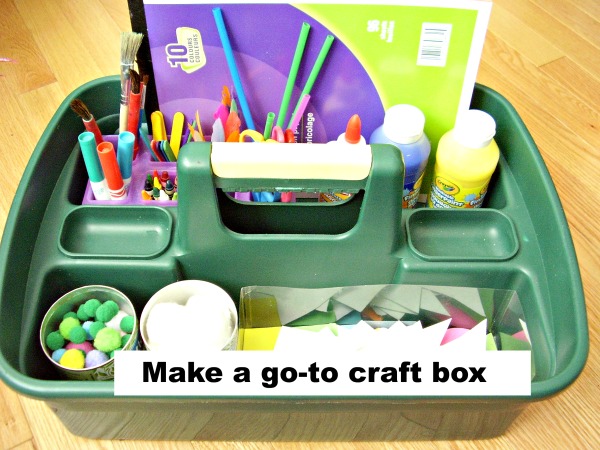
Make a Go-to Craft Box
Let’s look at why supporting kids art experiences is always a great idea.
- Promotes the growth of developmental skills including fine motor, cognitive, language, creative.
- Kids learn to take care of materials, to set up and clean up.
- Kids learn from social interactions doing projects with other children: cooperation; taking turns with supplies; sharing creative ideas.
The activities you provide do not have to be complex, requiring step-by-step instructions or a detailed list of craft supplies.
How to prepare a go-to craft box
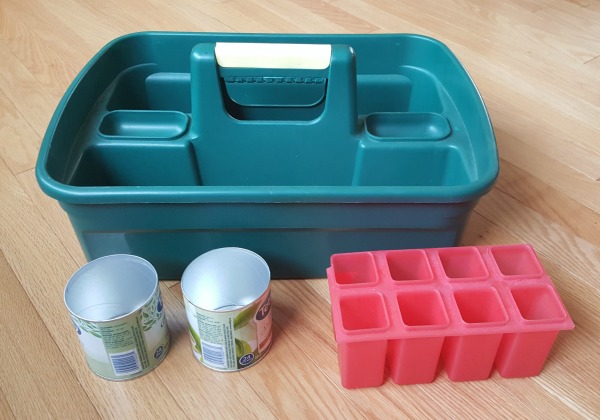
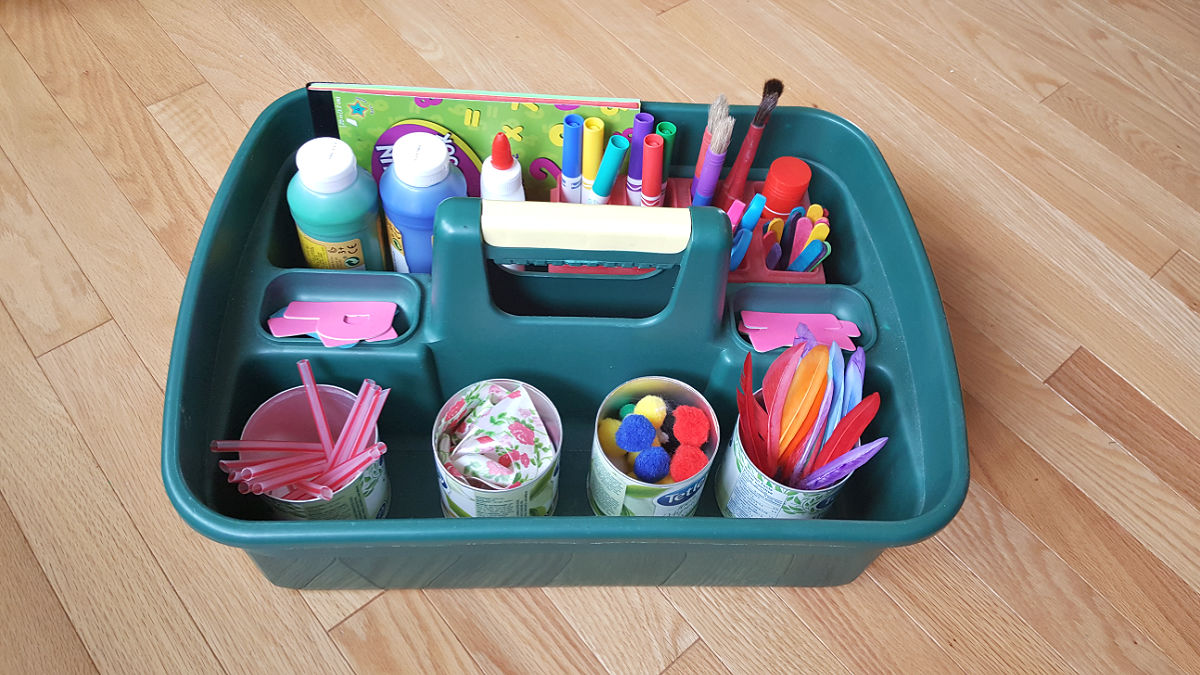
Start with a divided tote or storage box, maybe a tool box or tackle box.
Choose additional small containers that fit inside the tote box.
The size of the craft box and the dividers will be determined by the size and quantity of the items you want to provide for everyday art activities.
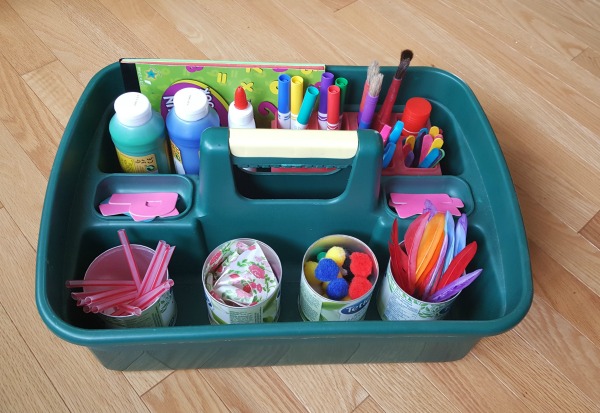
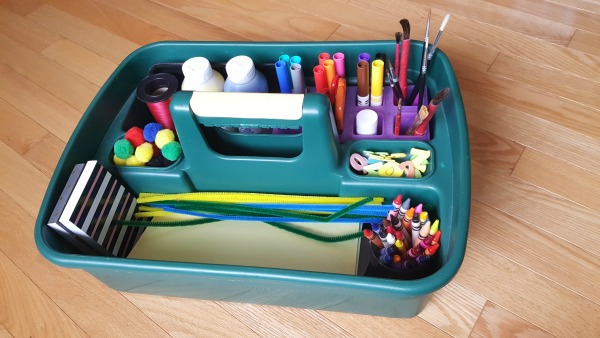
Fill the craft box with basic supplies such as paper, scissors, crayons, markers, and glue.
Keep supplies to a minimum so both you and the kids are not overwhelmed. Replenish supplies as needed and introduce a variety of new items from time to time.
Rotate items in the craft box according to skill levels and interest, to add a challenge, or just to spark curiosity.
Supplies for a go-to craft box
Here is a list of basic supplies:
- paper
- scissors
- glue sticks
- crayons and markers
- pompoms
- chenille stems
- craft sticks
- stickers
- paper straws
- paper shapes
Supplies such as paint, glitter and play dough can be introduced on days that allow for more time to prepare and clean up, or when you want to provide other hands-on learning opportunities.
Keep a drop cloth and clothing cover-up – such as an oversize t-shirt – in the craft box, or at least nearby, to protect clothing.
Having craft supplies on hand in a go-to craft box allows for spontaneous crafting times, as well as opportunities for hands-on learning at home or in the classroom.
Early learning classrooms often have art supplies available on a shelf or in a cupboard for free play time or independent creative opportunities.
Parents and care givers can offer similar art opportunities with a craft box that makes craft time accessible.
With the creative use of space and containers, and some basic organization, art prompts are just a craft box away.
Enjoy your creative time with the kids!

Visit our DIY for home and school on Pinterest!