Craft Stick Bridge Preschool Engineering Activity
Make a simple bridge with craft sticks in this fun STEM activity. Kids can think like engineers as they design and build a bridge to support toy cars.
This post contains affiliate links. Privacy and Disclosure
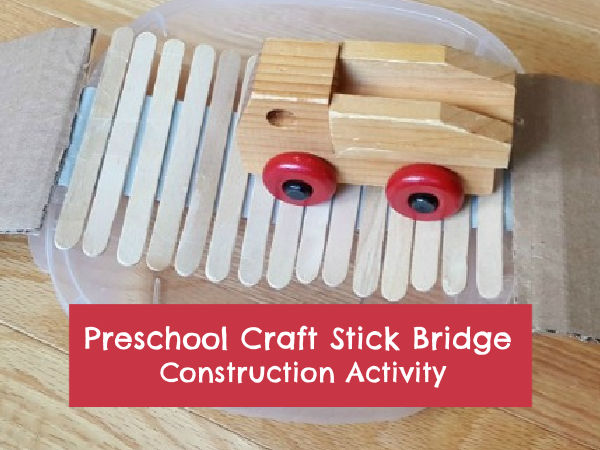
Let's build a bridge for toy cars! Our bridge is fun to make with a few craft sticks and some duct tape.
Kids love building roads and tunnels and bridges for toy cars and trucks. They'll often use anything available, including blocks and cardboard boxes to complete their structures.
A bridge-building activity with craft sticks and tape supports cognitive thinking and fine motor skills as kids experiment with the materials.
Follow your preschooler's lead as the construction rolls out! The possibilities are only limited by kids imaginations.
Craft stick bridge activity
This is one way to build a bridge with crafts sticks and tape, but not the only way. Welcome kids' creativity to the project.
- Set out the materials and give kids time to explore, discuss, plan, discover.
- Guide the play as needed. Duct tape is sticky, and may be hard for kids to manage on their own.
Materials for bridge building activity
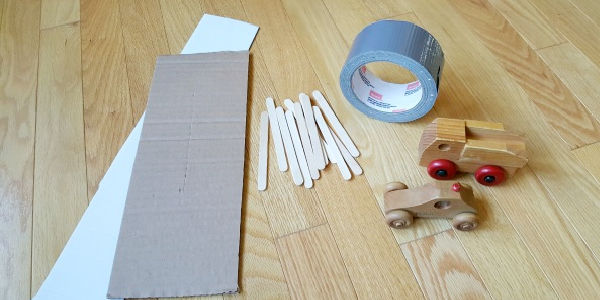
(Affiliate links provided for related products.)
We used duct tape along with the craft sticks for this activity.
- Duct tape is a multi-purpose material that offers creative possibilities for everything from crafting to household repairs. We love using duct tape for both!
Duct tape is strong enough to support toy cars in this bridge-building activity, but you can substitute masking tape or electrical tape or other strong tape.
We used regular size craft sticks but I think it would be fun to use jumbo craft sticks too.
- You might like to compare bridges for strength, size, and durability using different sticks. This adds more STEM learning to the activity.
Instructions for building a bridge
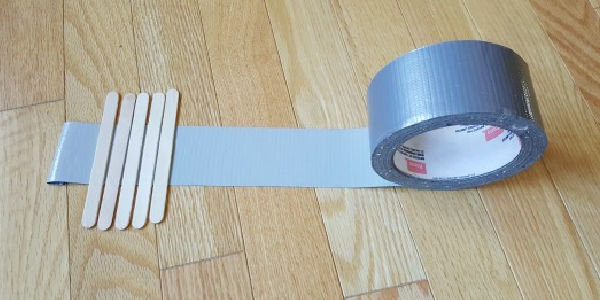
1. Roll out a piece of duct tape, sticky side up.
Roll the end over to stick to the floor, or secure the end to the floor with a piece of tape.
2. Place craft sticks on the duct tape.
Add craft sticks side by side until you reach a desired length for your bridge.
3. Cut the duct tape.
4. Fold both end edges over to make tabs.
The tabs will serve as handles for carrying the row of craft sticks without your hands sticking to the tape.
Now you can complete your bridge structure.
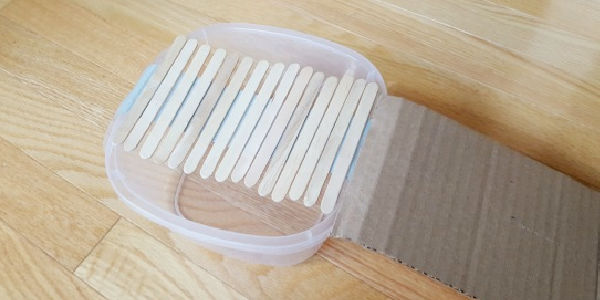
5. Place a tray or deep plastic dish on the table or floor to create a ravine or lake the bridge will cross.
6. Tape the tabs you made on the ends of the duct tape strip to opposites sides of the plastic dish.
7. Tape a cardboard ramp in place on each side as a roadway for the cars to access the bridge.
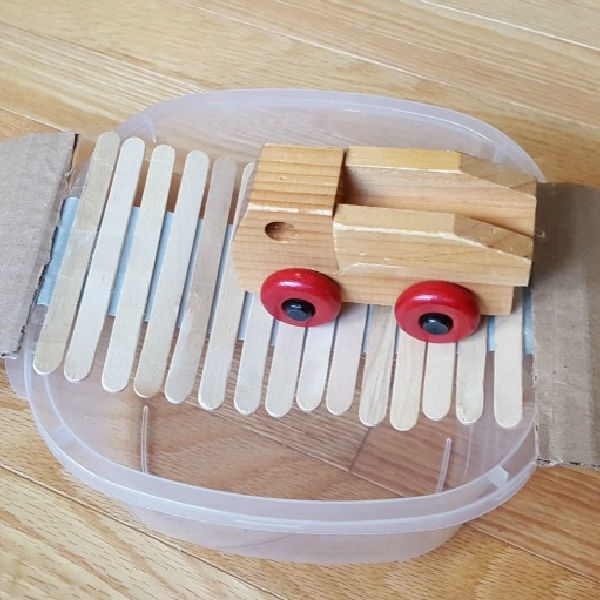
Drive your cars and trucks over the bridge. Add some water or other props to the "lake" under the bridge.
STEM play and learn
Is your bridge strong enough to hold a toy car as it passes over the ravine?
How many cars can it hold at a time?
Can you think of other ways to build the bridge?
There are lots of ways to build and create.
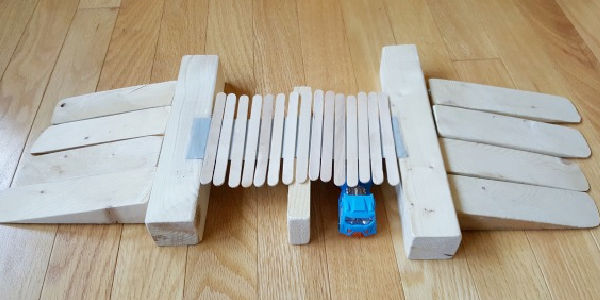
We used these slanted wooden blocks to make a ramp.
- We added a support in the middle so the bridge wouldn't collapse when cars rode through the tunnel.
Enjoy this bridge-building challenge with preschoolers!
(affiliate)
